Category Archives: Electronics

PD2435 and Arduino using I2C Port Expander

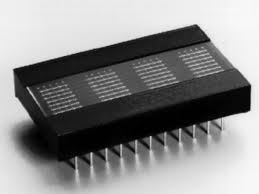
This information has been collecting dust on my hard drive.   Time to resurrect it…  Recently I have been working on a Temperature and  Humidity display and while working on it,  decided to use these RETRO parts I got from BGMICRO sometime around 2000. Even then, these parts were considered “pure unobtanium”.  I still had a few leftover displays, so out from the parts collection they come.

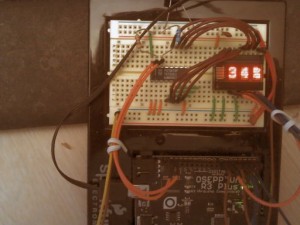
Now I had never taken the time to really get these displays working on an Arduino and what I really wanted was a test that would show off how much information you can really show using only 4 characters.

Since this project was to be inserted into an already working sketch, I made sure it was as modular as possible, sprinkled with subroutines that could be called from “who knows where” to get the job done.

I’ve tried to comment where it made sense and I have drawn up a quick schematic drawing to show just how its connected.  Since this part was designed for a CPU Bus Architecture of the 70’s and 80’s, it is annoying to see how demanding it is of the limited pin resources on the Arduino. The display assumes you provide data in a Parallel 8-bit format.  To relax this demand for pins, I employed a PCF8574 ( I2C port expander) that was harvested from some abandoned electronic board.  “YAY for recycling!”

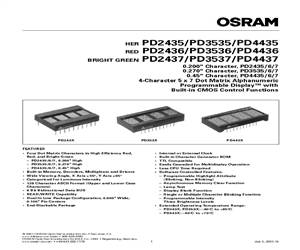
The parts I’m talking about are the PD243x displays from OSRAM.

So, what we have here is some sample code, for the Arduino, that allows you to send ASCII strings (including text scrolling) to these vintage displays.  Some of the information that helped me get beyond the datasheet was gathered from around the Internet (including blogs in New York, Japan and Korea)  Kudo’s to TechBlog in Korea for creating such a great resource.

display

Interesting side story: WAY BACK WHEN… BG Micro had horrible 3rd party photocopies of a facsimile for these parts. They were almost entirely unreadable.  At the time, datasheets were generally unavailable on the Internet,  so, after spending hours searching with “Altavista”, I finally found a clean PDF copy of the datasheet. Rather than just keep them to myself, I decided to give a nice clean datasheet back to BG Micro so they could share it with other customers who purchased the parts.

PD2435 PD24xx

DATASHEET

APPNOTE

CODE-DOWNLOAD

SCHEMATIC

CODE

//==============================================================================
// PPPP  DDDD  2222  4  4  3333  77777        III  N   N OOOOO
// P   P D   D     2 4  4      3    7          I   NN  N O   O
// PPPP  D   D  222  44444  333    7           I   N N N O   O
// P     D   D 2        4      3  7     ..     I   N  NN O   O
// P     DDDD  22222    4  3333  7      ..    III  N   N OOOOO
//==============================================================================

//==============================================================================
// Program:      PD2437.ino
// Author:       Pete Willard
// Version:      0.01
// Target:       328p IDE 1.03
// Date:         2013/01/27
// Time:         12:00:18
// Notes:

// This program is free software: you can redistribute it and/or modify
// it under the terms of the GNU General Public License as published by
// the Free Software Foundation, either version 3 of the License, or
// (at your option) any later version.

// This program is distributed in the hope that it will be useful,
// but WITHOUT ANY WARRANTY; without even the implied warranty of
// MERCHANTABILITY or FITNESS FOR A PARTICULAR PURPOSE.  See the
// GNU General Public License for more details.

// You should have received a copy of the GNU General Public License
// along with this program.  If not, see <http://www.gnu.org/licenses/>.

// Reference: "nautes Tech Blog", "David Croft @ davidc.net"
//==============================================================================

//=====[ INCLUDE ]==============================================================
#include stdlib.h
#include Wire.h
//=====[ CONSTANTS ]============================================================
#define   DEBUG     1   // 0 = debugging disabled, 1 = enabled
// Address of PCF8574 IC on TWI bus is address 0100xxx (0x20)
// while the PCF857A address is 0111xxx. (0x38)
#define IO_ADDR (0x20)

//=====[ PINS ]=================================================================
int Led = 13;  // Not used
// Connected to PD2437 directly
int PA0 = 2;   // Address 0 (pin 9)
int PA1 = 3;   // Address 1 (pin 8)
int PA2 = 4;   // Address 2 (pin 7)
//
int WR = 7;   // Write (pin 7)
int CE = 5;   // Chip Enable (pin 6)
int RST = 6;  // Reset (NEG, pin 11)
//=====[ VARIABLES ]============================================================
char messagebuffer[21];

//=====[ SETUP ]================================================================
void setup()                    // run once, when the sketch starts
{
	Serial.begin(9600);
	Wire.begin();        // initialize the I2C/TWI interface

	// Setup pins for PD2437
	pinMode(PA0, OUTPUT);
	pinMode(PA1, OUTPUT);
	pinMode(PA2, OUTPUT);
	pinMode(WR, OUTPUT);
	pinMode(CE, OUTPUT);
	pinMode(RST, OUTPUT);

	// Reset PD2437
	digitalWrite(CE, HIGH);
	digitalWrite(WR, HIGH);
	digitalWrite(RST, LOW);
	digitalWrite(RST,HIGH);
	AsciiMode();
}
//==============================================================================

//=====[ LOOP ]=================================================================
void loop()                     // run over and over again
{

	// Can do this...
	char messagebuffer[] = "  Temperature: 68F  ";
	ClearDisplay();
	ScrollDisplay(messagebuffer);
	delay(1000);

	// Random Length String with INT value added
	int n = 34;
	sprintf(messagebuffer,"   Humidity: %2d%%  ",n);
	ClearDisplay();
	ScrollDisplay(messagebuffer);
	delay(1000);

}

//==============================================================================
//=====[ SUBROUTINES ]==========================================================
//==============================================================================

void CommandMode(){
	digitalWrite(PA2, LOW);  // enable command mode
}
//==============================================================================

void AsciiMode(){
	digitalWrite(PA2, HIGH);  // enable ASCII mode
}
//==============================================================================

void TogglePin(char bitpin) {
	digitalWrite(bitpin,!digitalRead(bitpin));
}
//==============================================================================

void PulsePin(char bitpin) {
	TogglePin(bitpin);
	TogglePin(bitpin);
}
//==============================================================================

void ClearDisplay() {
	CommandMode();
	PutChar(0, 0x83);
	delay(100);
	AsciiMode();

}

//==============================================================================
// Note: This looks funny because it reads the buffer from right to left
// Blame the display...  :-P

void WriteDisplay(char *input) {
	for (int i=0; i<4; i++) {
		PutChar(i, input[3-i]);
	}
	input = "";
}
//==============================================================================

void SetByte(int ch) {
	// Use TWI output Mode to Write to DATA BUS PINS on PD243x
	Wire.beginTransmission(IO_ADDR);
	Wire.write(ch);
	Wire.endTransmission();
}
//==============================================================================
// set address for PD243x

void SetAddr(int adr) {
	digitalWrite(PA0, (adr&0x1));
	digitalWrite(PA1, (adr&0x2));
}
//==============================================================================
// Main Character writing routine

void PutChar(int pos, int ch) {
	SetByte(ch);			// Pre-set the 8 bit data bus
	SetAddr(pos);			// pre-set the address bus
	digitalWrite(CE, LOW);	// Enable Display
	PulsePin(WR);  			// Read inputs and display it
	digitalWrite(CE, HIGH);	// Disable Diplay
}
//==============================================================================

void ScrollDisplay(char *ascii) {
	char buffer[4];
	int i = 0;
	boolean blank;
	while(ascii[i] != 0){
		blank = false;
		for (int ii = 0; ii<4; ii++) {
			if ( !blank && ascii[i + ii] == 0 ) {
				blank = true;
			}

			if ( blank ) {
				buffer[ii] = ' ';
			}
			else {
				buffer[ii] = ascii[i + ii];
			}
		}
		buffer[5]=0;
		WriteDisplay(buffer);
		delay(250);
		i++;
	}
}
RS485 – The PC side

RS485 with Automatic Transmit Enable
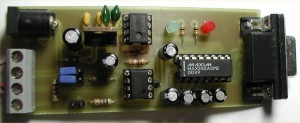
Here is a simple RS232-485 converter for the PC serial port I developed with the help of a Circuit Cellar article by Jan Axelson about RS485 interfacing.
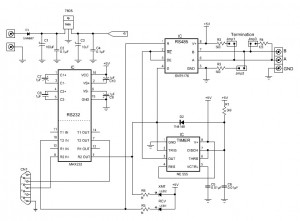
It uses a 555 as a monostable to enable the transmit mode only when “sending”.
It’s a pretty basic circuit and nothing special is really happening here other than the portion involving the LM555 timer. The termination jumpers allow the 120 OHM termination on the master node as well as the balancing termination resistors connected to +5V and GND.
There were only minor changes throughout development. For example, originally the indicator LED’s were ON unless sending since they were tied to GND. Now then go LIT when sending, which is more intuitive, I suppose.
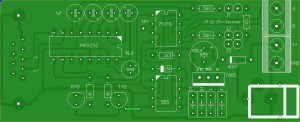
Here is the circuit:

Overall this was an Easy Project.
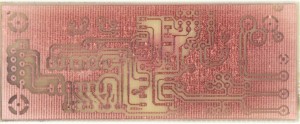
And yes, this is a HOMEBREW toner transfer method PC board. The DRAWING package is NOT EAGLE but rather ABACOM SPRINT LAYOUT and ABACOM SPLAN.

Tagged

A reference to how heat can impact common components

I decided to pull some information from old notes while cleaning up the really old paper in my desk.  Here is a list I created to remember how heat (in excess of 100°F) can impact common parts like capacitors and transistors, etc.

Current Weather Station

Arduino Mega

AAG One Wire Weather Instrument Series 2. (Wind Speed, Temperature, Wind Direction)  DS18B20 temperature, DS2423 (wind speed) DS2450(wind vector)

Hobby Boards: Humidity/Temperature Board – Built from my own parts

Rain Gauge (See my post about it)

BMP085 – Pressure Sensor

Internal Temperature via DS18B20

1-Wire Power Injector (see my “how to make a PCB guide):

In progress: COSM upload – nope.

FAIL:  Adding COSM/PACHUBE support ran me out of working RAM… so project for upload of data is scrapped at the moment.

Updated Rain Gauge

Newest Rain Counter

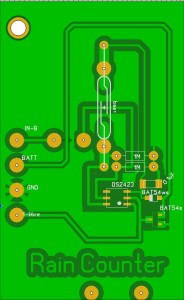
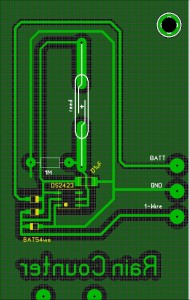
So I’m taking the time to re-do the rain gauge. The existing one clearly had some issues (hacks/fixes) and I wanted to also gain the use of counter B (if possible) for a different piece of weather gear.

Rain Counter version 7

I was also able to get a hold of some “liquid tin” from MG Chemicals to see if it compares well to Cool-AMP powder as a copper plating solution.

Results:

While the Liquid Tin is much easier to apply, I actually don’t like it as much as the Cool-Amp coating.

Weather Station – Hacked Rain Gauge

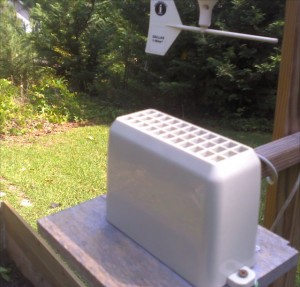
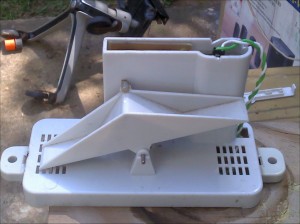
Converting a broken  LaCrosse WS-9004U 915MHz WIRELESS RAIN GAUGE into a “wired” 1-wire  0.02 inches per tip rain gauge.

The Lacrosse unit is an inexpensive rain gauge available from my local Fry’s store for about $24.  They are unusually finicky when being set up so I already knew I didn’t really have a lot of love for the device.  After about 6 months, my unit stopped sending/receiving updates and no amount of new batteries, resets or pairing attempts seemed to help.  I tossed it into my junkbox of parts.

Right around the time that MAXIM decided that making 1-wire devices was “tooo haaarrd”, (said in a whiner voice) and they killed off the DS2423 counter device, I decided to buy some before they were totally gone to see if I could make my junkbox tipping bucket hardware work in a “wired” mode.

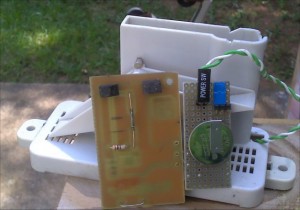
It wasn’t really that hard.  I used a sample design from my WEATHERTOYS book, (AUTHOR: Tim Bitson), and  after ripping all the guts out of the device (wireless sender and battery holder, I had some room for some 1-wire related parts.

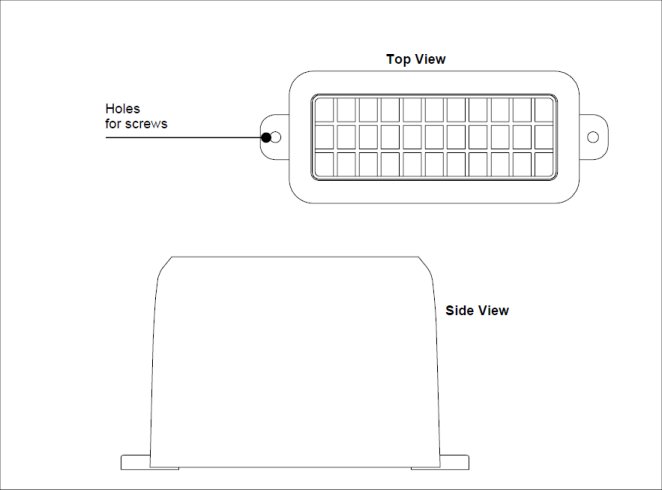
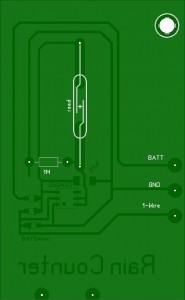
The original PCB  fits in a nice slot in the plastic case and used a reed switch aligned with a magnet attached to the center of the tipping bucket.  I used the dimensions to create a replacement board and everything fit except the CR2032 battery needed by the counter to not lose data when 1-wire was shorted or disconnected.

Original Board:

The CR2032 nicely fit into the area where the prior AAA batteries were housed.

The 1-wire connection is made by using a weatherproof gel-filled crimp splice available from the local hardware store.

The code (java in my case) is straight from the Weathertoys book with adjustments made relating to the side of the tip, 0.02 inches per tip.

Installation

The Guts

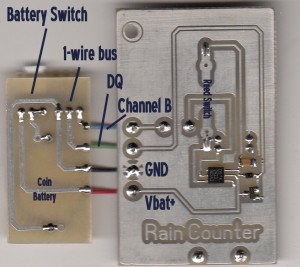
The main board and battery board

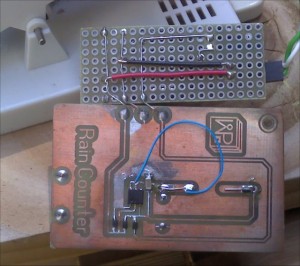
The backside

Note: Not my best work…  I attempted to re-orient the reed switch during testing, which only managed to a) break a reed switch and b) break a copper trace (fixed with blue wire).  In addition, I actually installed the wrong SMD part that I thought was a DS2423… which turned out not to be the case…

I suppose I could make a new board… but once this one started working… I just left it alone.

The gauge is currently off the station since I forgot to paint the plank, made from ash, used to mount the sensor.  Small ants were using the aging cellulose to create a fungus garden under the cover of the rain collector.  Silly me.  Now I must replace and paint the replacement wooden board.

Next Step.  Stop using a Linux server and JAVA and convert over to an Arduino  MEGA2560 as a weather station controller.

Weather Station Woes

I might have mentioned that my AAG WS603B Weather Station turned out to be the most oddball replacement for my original 1990’s Dallas 1-wire Weather instrument.  It worked reliably for 10 years.  I had version 1.0, which was rather difficult to program for as it used the DS2401 serial number for each wind direction.  This required a lot of extra  1-wire coding.

I’ll spare you some of  the gory details regarding the quality of the latest AAG unit though I should mention that it was incompatible with all 1-wire wiring standards to date.

The real problem with the new unit (other than reliability) was that the new case is clear (no so bad) full of colored LED’s (can you say SILLY?) and not water resistant. Even though the case seemed closed and the PC board was “sealed”, it still managed to die after 6 months of usage.   It took 6 months of trying to get the Windows software from them for the station… by then… the device was dead. I’ll not be buying anything else from AAG.

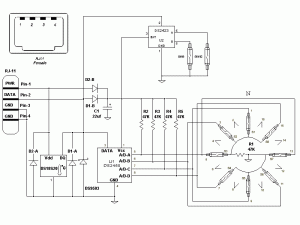
Anyway, one of the design ideas that AAG implemented was actually quite sensible. They used HALL sensors for Wind Direction instead of the fragile reed switches as used with other station designs. The Dallas Version 2 weather station (formerly sold by AAG) used a DS2450 and reed switches to track 16 positions of wind direction with just 1 magnet rotating. Only 8 sensors were needed as the intermediate positions were resolved when the magnet straddled two sensors at once.

Dallas Weatherstation version 2 Schematic:

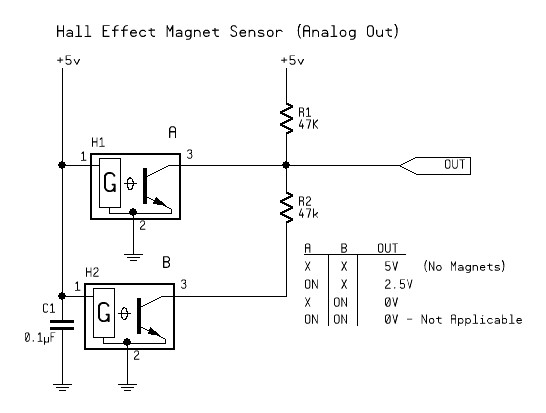
I attempted to recreate this solution with Hall Effect Sensors. My first test circuit is below. Seems to work well.

So now my plan is to rebuild a replacement for the failed board in the WS603 housing.

Barometric Pressure

While looking at low cost pressure sensors in the Mouser Electronics catalog, I located the FREESCALE MPXAZ6115A as a possible sensor for my project. The sensor has the following statistics;

Device: MPX6115, MAX PSI 16.7, MAX kPa 115.

Since barometric pressure here hovers at around 100kPa or so, this sensor would do just fine. The analog output of the sensor is relative to the min/max pressure range of the sensor.

According to my initial tests, the sensor would output about 4.06 volts at 100kPa.

The built-in analog input on the Arduino would also keep the circuit simple and after a few tests I was able to determine the offset value I needed to get correct readings for the localized barometric pressure.
In my case… testing showed that the magic number is 0.13.

// Nominal Transfer Value:
// Vout = VS x (0.009 x P – 0.095)
// ± (Pressure Error x Temp. Factor x 0.009 x VS)
// VS = 5.1 ± 0.25 Vdc

float Vin;
float P;

void setup()
{
Serial.begin(9600);
}

void loop()
{
Vin = (5.0/1024.0) * analogRead(0);
Vin = Vin + 0.13;     // Offset Adjustment
 Serial.print(Vin);
 Serial.println(" Volts");

P=((Vin/5.0)+0.095)/0.009;
 Serial.print(P);
 Serial.println(" kPa");

Vin = (P * 0.2952999);
 Serial.print(Vin);
 Serial.println(" Inches of Mercury");
delay(2000);
}

I’m using a LADYADA Boarduino on a solder-less breadboard for testing. The sensor hookup is dead simple with only one exception that makes it tricky. The part I selected is designed to be surface mounted.

I decided to create a carrier board using the board layout software I prefer called SprintLayout from ABACOM in Germany. Other than 5V power and ground connections, the Vout from the carrier board goes directly to the Arduino Analog(0) pin.

To create the PCB board, I use the GOOTIE toner transfer method to apply the layout on the PCB for etching. (google search “gootie PCB” for more info)

Having developed a dislike for the chemical etchant that Radio Shack sells; Ferric Chloride, I have also adopted the etchant that
Gootie describes.

It is based on the swimming pool chemical Muratic Acid and Hydrogen Peroxide in a 1 to 2 ratio. It’s fast, non-opaque and does not require heating or excessive agitation.

Note: I also recently picked up a used GBC Creative Laminator at the local Goodwill for $14.00. It does an excellent job of applying the toner to the copper on the PCB to be etched. Using an hand iron was OK, but the results were not always predictable.

My method of making PCB’s at home.


Here is the Layout: