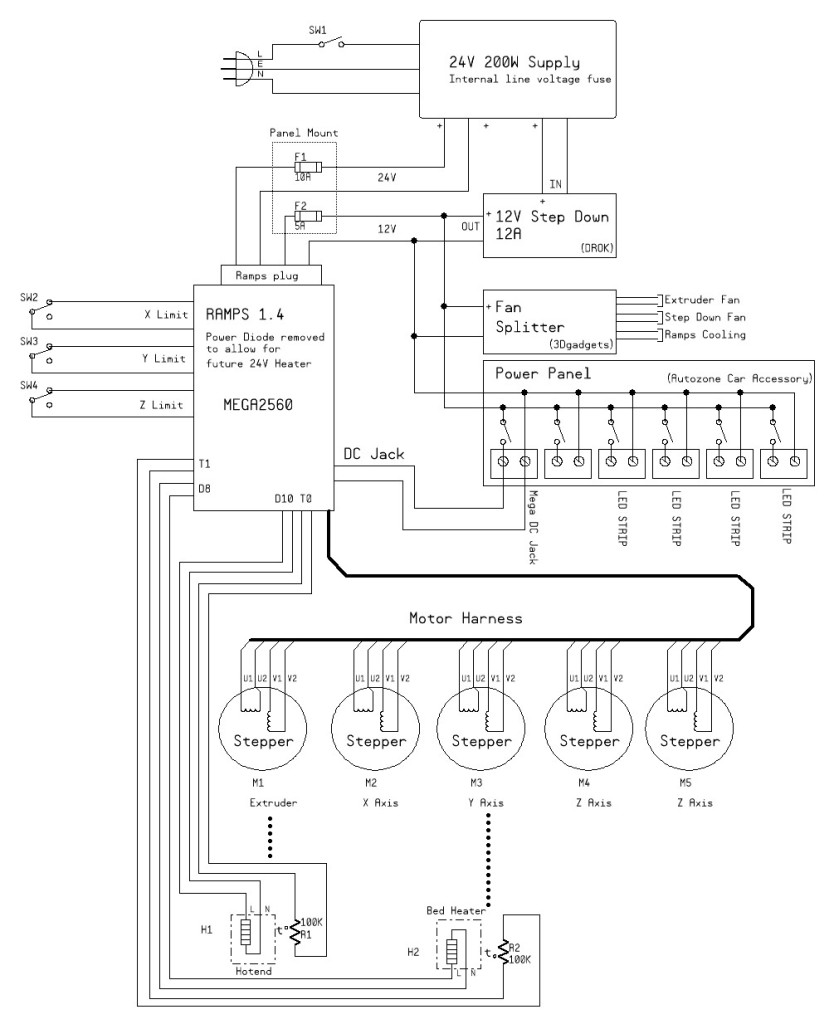
I recently added a 24V Kapton heatbed and new Y rail system to replace the finicky dual rod system. The upgrade required me to remove the existing 12V power supply and replace it with a 24V 200W supply. Since only the new heater in the bed requires the 12V I also installed an adjustable Stepdown DC/DC regulator (A 12A unit for sale on Amazon for about #$12 under the name DROK). The unit does get slightly warn during use, so I added a small fan for the smaller regulator that supplies 12V for all the motors, the controller boards and the fans.
The power for the Arduino mega is controlled via a switch from a 12V distribution panel I purchased at Autozone designed to allow power control for up to 6 unique devices. So the unit can still run standalone if needed. I removed the Diode on the Ramps 1.4 board that supplies power to the Arduino since there are those times when you just want to kill power to the arduino board.
The on board Polyfuses were removed and replaced by a piece of hookup wire. The fuses for the power source are now panel mounted using standard 3AG fuse holders.
Note: My USB cable that comes from the PC already has a switched power option.
On a side note: Working with Brian at Ultibots regarding my Y axis upgrade was a superbly positive experience. Ultibots is now my first choice for parts.
