Category Archives: Raspberry Pi

Digital PDP-8/I – continued – Emulating in SIMH

===============================================

DIGITAL PDP8/I Continued
===============================================

I actually use my own real VT220 to communicate with my PiDP-8 emulator

As mentioned in a previous post, this family of devices was used in many of the in-house test systems for the central incoming test group also located in our building as well as some of the newer PDP-11 series devices.

It has a very small instruction set and a word size of 12 bits. First devices where delivered with 4K words that could be extended to 32K words using an extension board in the integrated circuit models.

These devices supported ASR33 ‘typewriters’ that also supported paper tape for entering and saving code. There were also TU56 tape (184K) drives which essentially worked more like random access disk drives than what we traditionally think of as tape drives. There was also disturbingly large disk drives with seriously small storage space (less than 3Mb). Later in the series, there was also an 8″ floppy called the RX01, which I personally encountered on the WT78 Word Processor while doing my college homework (with permission… after hours at the office). A slightly larger storage capacity 8″ RX02 arrived the same year.

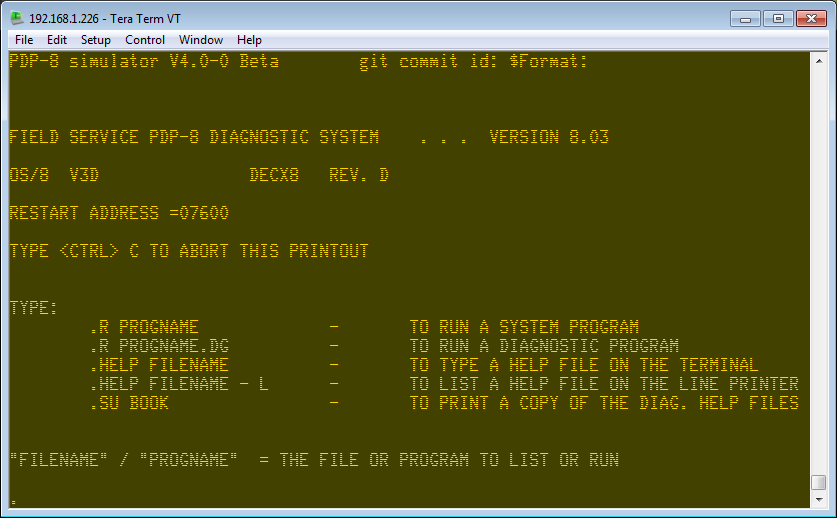
Configuring a PDP-8 in SIMH

The environment I’m using is based on Oscar Vermeulen’s Pidp8 (a Raspberry Pi Zero with with switches and led’s emulating a PDP-8 front panel). Oscar assembled a custom release of SIMH 4.0 including a GPIO handler to drive the LEDS and read the front panel switches for a full retro-experience.

There is a website that stores many PDP-8 device images that can be used with the SIMH/PDP8 emulator. They are found here, pdp8 online

Examples:

$wget http://www.pdp8online.com/ftp/images/misc_floppy/os8_v3d_bin_1.rx01
$wget http://www.pdp8online.com/ftp/images/misc_floppy/os8_v3d_bin_2.rx01

Using the PiDP-8/I front panel

If it’s not clear, when the top of the switches on the panel are pressed IN, the switch is in a “0” state, and when the bottom of the switch is pressed in it represents a “1” state.

PiDP-8/I Simulator

I have a brief but ancient history with the PDP-8 from Digital Equipment Corporation. I started working for DEC in the winter of 1977/78, just after my senior year in high school. I was in college studying radio/television production. When a film crew arrived one day to make a training video for the company, I asked if I could intern on the project. I’d worked there a while by then and had a good relationship with my boss, so I got a green light to do it.

The training video project was for a dedicated bed-of-nails tester for the new PDP-11/23 board that was about to go from prototype assembly to full production in Puerto Rico. The facility that I worked at performed central incoming chip testing as well as the prototype assembly process for the PDP-11/23. All of the test equipment was driven by DEC PDP computers, which was pretty impressive.

The test machine we were making a video for had a massive amount of input/output pins that were controlled by the PDP-8. It had a paper tape reader, an RK08, a console terminal interface and an expansion chassis that led to the 3rd-party I/O pin controllers and timing hardware. The bed of nails fixture was built specifically for the PDP-11/23 and used sharp spring loaded pogo pins for connectivity to all the “special places” to be probed on the underside of the board.

In the training video, I showed how to perform the boot process, that involved loading a series of commands into the front panel in octal. These steps told the machine how to read the paper tape. The next step was to run what the paper tape loaded (The tape drive), which was the program that knew how to spin up and use the RK08 disk and make the serial terminal work. From there, the text application could be executed from the operator terminal.

So where is all this leading?

I just purchased a kit from Oskar Vermeulen called PiDP-8, a PDP-8/I simulation with real front panel switches and blinken lights. Yes, Blinken does mean “to flash” in German. The kit is based on a Raspberry Pi and uses the SIMH computer simulation program.

pidp8PDP

His website is at Obsolescence Guaranteed

I’m still waiting for the kit to arrive… but I have the PI running.

Screenshot 2016-04-26 20.11.40

Raspberry Pi – Node.js – Mongodb recipe

Node.js with Mongodb build

Post install cleanup


sudo apt-get update
sudo apt-get remove --purge wolfram-engine
sudo apt-get remove --purge minecraft-pi python-minecraftpi
sudo apt-get remove --purge penguinspuzzle
sudo apt-get remove --purge scratch nuscratch sonic-pi

Remote Access with VNC

sudo apt-get install tightvncserver

Setup password…

vncserver -geometry 1024x728 -depth 24 -dpi 120

Kill the server in preparation for boot automation…

vncserver -kill :1

Setup the autostart init.d based file in `/etc/init.d`

sudo nano /etc/init.d/vncserver

File contents:

#!/bin/sh
### BEGIN INIT INFO
# Provides: VNC
# Required-Start: $local_fs
# Required-Stop:
# Default-Start: 2 3 4 5
# Default-Stop: 0 1 6
# Short-Description: Start or stop the VNC server
### END INIT INFO

PATH=/sbin:/usr/sbin:/bin:/usr/bin

eval cd ~pi

case “$1” in
start)
su pi -c “/usr/bin/vncserver :1 -geometry 1024×728 -depth 24”
echo “Started VNC server.”
;;
stop)
su pi -c “/usr/bin/vncserver -kill :1”
echo “Stopped VNC server.”
;;
*)
echo “Usage: vncserver [start|stop]” >&2
exit 3
;;
esac

exit 0

The following commands will set up the new file so it will operate correctly…

sudo chown root:root /etc/init.d/vncserver
sudo chmod 755 /etc/init.d/vncserver
sudo update-rc.d vncserver defaults

Now we need to add cut/paste support…

sudo apt-get install autocutsel

and add it to the VNC startup file in the PI user account…

sudo nano .vnc/xstartup

so it looks like this:


#!/bin/sh
autocutsel -s CLIPBOARD -fork
autocutsel -s PRIMARY -fork
xrdb $HOME/.Xresources
xsetroot -solid grey

#x-terminal-emulator -geometry 80x24+10+10 -ls -title "$VNCDESKTOP Desktop" &
#x-window-manager &
# Fix to make GNOME work
export XKL_XMODMAP_DISABLE=1
/etc/X11/Xsession

Installing Nodejs dependencies:

build-essential and git

sudo apt-get install build-essential git

Node.js

wget http://node-arm.herokuapp.com/node_latest_armhf.deb sudo dpkg -i node_latest_armhf.deb

MongoDB

git clone https://github.com/svvitale/mongo4pi.git cd mongo4pi sudo ./install.sh